A TrailMeister Column – With Field-Tested Wisdom for Safer, More Confident Trail Riding
For something as old as horsemanship itself, you’d think the humble halter would be simple. You’d think the one piece of tack every horse and mule must have would be straightforward. Yet as anyone who’s spent time around barns knows, the halter world is full of opinions, debates, and “must-use” ideas that don’t hold up once you actually put miles on the trail.
The halter, derived from a Germanic word meaning “holder”, is one of the most familiar tools we use: catching, leading, hauling, grooming, training, camping, packing. Yet despite its simplicity, choosing the right halter can make all the difference in communication, safety, and confidence, especially once you leave the arena and step onto the trail.
After scores of trail miles, countless clinics across the country, and working with horses and mules of every personality, I’ve found that halters fall into three categories: useful, situational, and occasionally disastrous. Here’s a field-tested breakdown to help you make confident choices long before your next trail ride or camping trip.
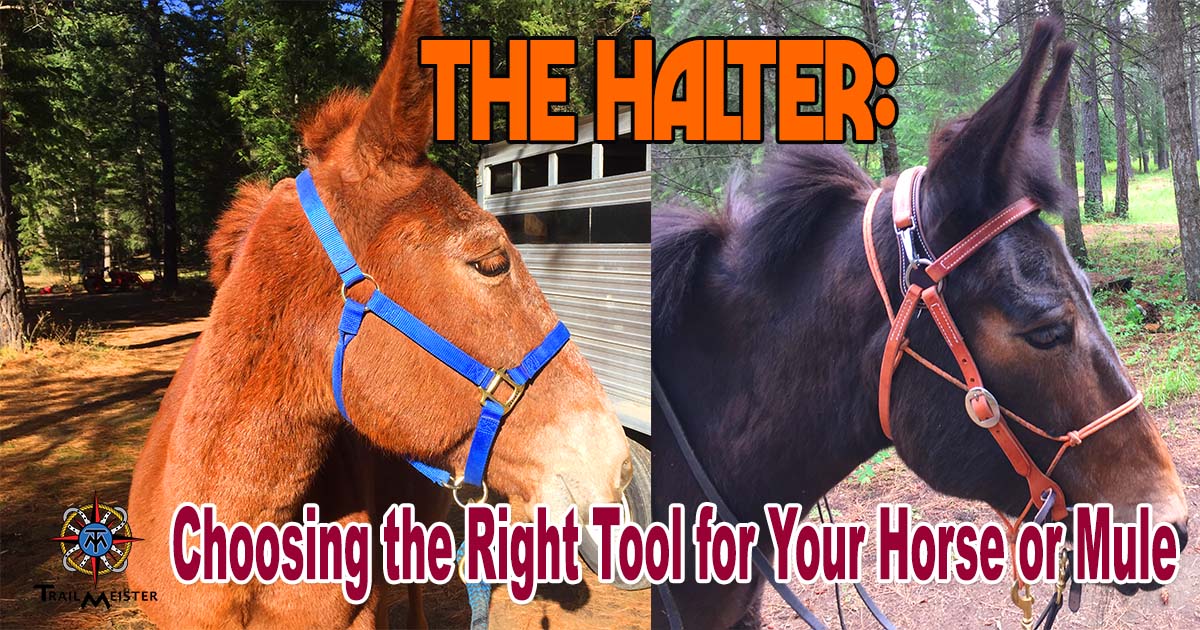
Flat Halters: Classic, Comfortable, and Often Misunderstood
Flat halters, usually nylon or leather, are the standard in most barns. The broad straps distribute pressure and look gentle, which is why many riders gravitate toward them. Leather versions add a bit more give. Some include breakaway crowns intended for safety during panic situations.
Used well, flat halters excel in:
- Trailering
- Grooming or daily handling
- Short rides with a bridle over top
Ellie, my steady pack mule, wears a leather packer’s draw halter on the trail because it stays comfortable for long miles. She’s honest, consistent, and doesn’t test her halter, qualities that make flat a great match.
But flat halters have downsides:
Nylon can be too strong, if your horse panics while tied, failure points are unpredictable and often dangerous.
Breakaway straps sometimes break at the wrong moments. Clever animals learn fast when equipment creates easy escape routes.
This is one of the most common issues I help riders troubleshoot during my clinics: equipment that looks kind but unintentionally reinforces bad habits.
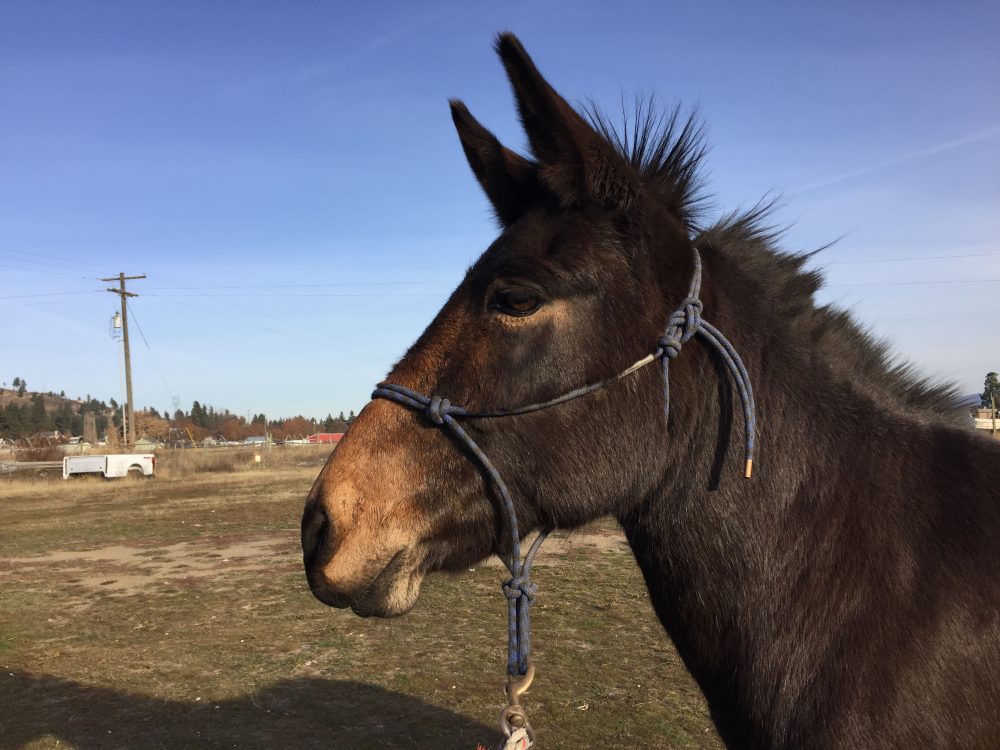
Rope Halters: Clarity, Precision, and Better Communication
A rope halter is simply a single length of rope, usually 6–8 mm in diameter, tied into form. Because the knots and thinner material create more defined pressure points, your horse feels guidance more clearly. This clarity allows you to use less pressure, not more, which is why rope halters have become indispensable in my trail-skills clinics.
Rope halters vary:
- Diameter: thinner = more focused pressure; thicker = softer
- Noseband style: knotted vs. flat braided
Choosing the right one depends on your horse’s sensitivity and your goals.
A major advantage, especially important for trail riders, rope halters rarely fail at the wrong time but can be cut loose instantly in an emergency. I keep spares in my truck, trailer, and saddlebag, because a rope halter can prevent a world of headaches.
How to Tie a Rope Halter Correctly
Most rope halter failures trace back to incorrect tying. Done right, it’s simple:
- Stand on the near side (left side) of your horse. Reach over the neck and grab the poll strap with your right hand.
- Slide the noseband over the horse’s nose and the throat knot upwards below the jaw.
- Take the end of the poll strap pointing towards you and run it through the tie loop.
- Put your thumb on the top of the loop.
- Run the end of the poll strap behind the loop and then tuck through the space between the loop and the strap.
This forms a sheet bend, a reliable, secure knot I teach step-by-step in my clinics.
Always make sure the tail points toward the hindquarters and not the eye.
The Breakaway Debate: Field-Proven Reality
Few pieces of equipment spark more heated barn-aisle discussions. Here’s the blunt truth from real trail miles:
In the backcountry, I do not use breakaways.
A loose animal in deep country isn’t just inconvenient. It’s dangerous. Horses can vanish into timber and not return.
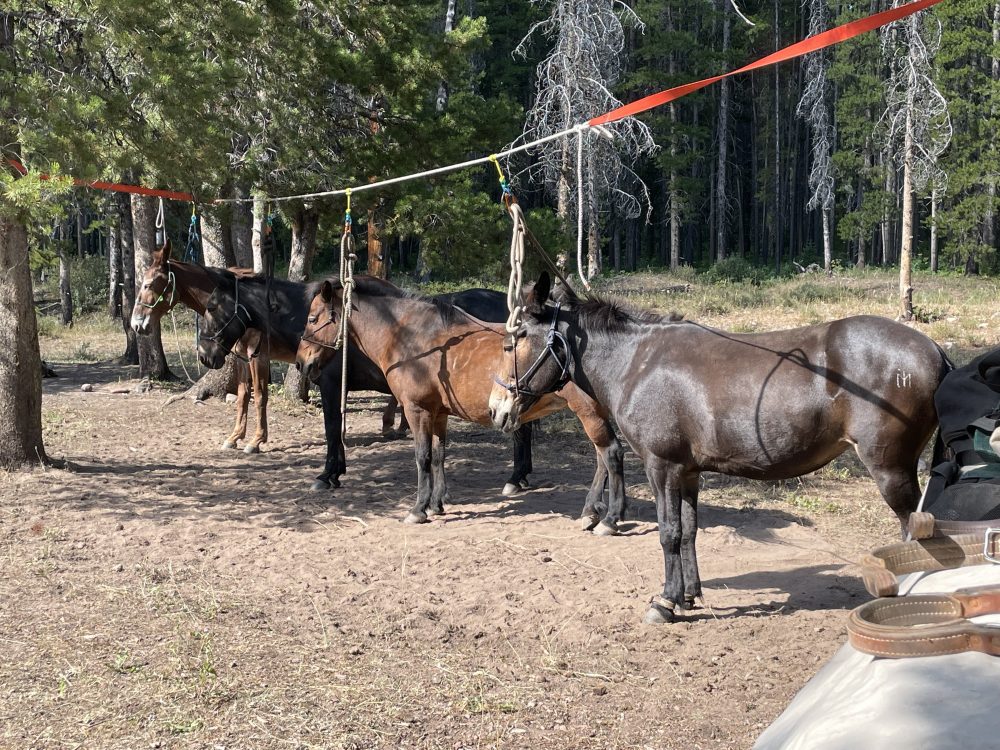
Closer to home, breakaways create new risks. Once a horse learns it can “break away,” many try again, usually at the worst time.
No matter the halter type, remember this:
- No halter is safe on an unsupervised horse.
- Remove it and remove the risk.
This safety mindset is something I emphasize heavily in my clinics, because the right habits prevent emergencies long before they happen. Your halter is the first conversation you have with your horse every day — choose the one that speaks clearly, kindly, and safely
Final Thoughts (and Your Next Step)
Choosing the right halter isn’t about trends—it’s about safety, communication, and confidence. No halter is perfect for every job, but each shines in the right situation. When you pair the right halter with good handling skills, everything gets easier: catching, tying, saddling, camping, and every trail mile in between.
If you want to go deeper into practical, real-world trail skills, you’ll find more in my books:
- The ABCs of Trail Riding and Horse Camping,
- It’s a Cinch!, and
- Daily Wisdom from the Saddle.
And if you want hands-on guidance, choosing safe gear, preparing for backcountry trips, or building your own cinches, join me at one of my upcoming TrailMeister clinics.
For clinic dates, articles, videos, and the nation’s best horse trail and camp directory, visit www.TrailMeister.com.