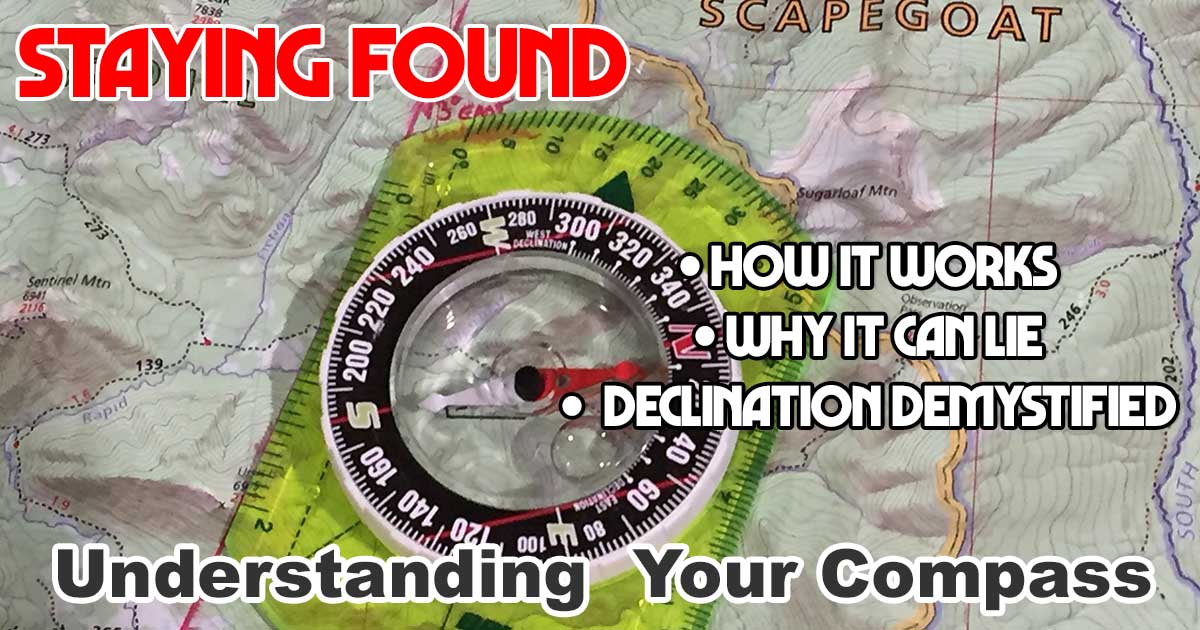
More than North – Understanding Your Compass
Modern GPS technology is very useful. However, it’s far from foolproof. And consider this. What if your GPS breaks? How will you find your way back to the trailhead? A magnet on a stick can give you important clues.
Compasses are simple tools that remain important even in this era of high technology. Every trail rider should know how to use a compass. The following is a good start to help you “Stay Found” through Understanding Your Compass.
“Men go back to the mountains, as they go back to sailing ships at sea, because in the mountains and on the sea they must face up, as did men of another age, to the challenge of nature. Modern man lives in a highly synthetic kind of existence. He specializes in this and that. Rarely does he test all his powers or find himself whole. But in the hills and on the water the character of a man comes out.” – Abram T. Collier
Types of Compasses
While there are several types compasses available, two models stand out as the standard equipment for riders and other outdoorsmen: the lensatic compass and the orienteering, or baseplate compass.

Orienteering Compass
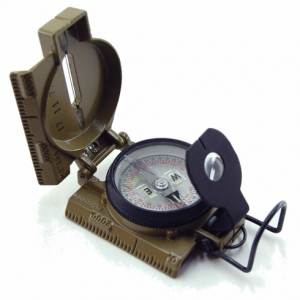
Lensatic Compass
While the lensatic model is standard issue for the U.S. military. It is heavy and requires a little more practice to become proficient. The information that follows is based on the baseplate model, since it is both the least expensive, most common, and the more easily used of the two. However, the basic concepts involved in navigation apply to both types.
Breaking It Down – Parts of a Compass
At first glance, the orienteering compass can seem a bit daunting. Covered in various markings and with multiple moving parts, it looks as though it demands a high level of skill to operate. Quite to the contrary, with a little bit of knowledge of the basic functions, anyone can work an orienteering compass like a pro.
An orienteering compass consists of a magnetized metal needle that floats on a pivot point. The needle orients to the magnetic field lines of the earth.
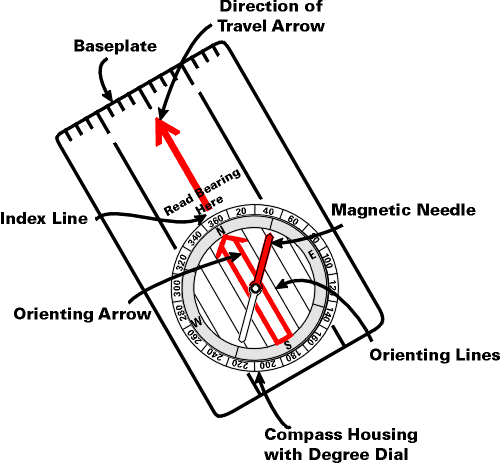 The basic orienteering compass is composed of the following parts:
- Base plate – Clear is good to read the map
- Straight edge and ruler
- Direction of travel arrow
- Compass housing with 360 degree markings
- North label
- Index line – Located above the bezel, it’s also called a “read bearing here” mark.
- Orienting arrow – Used to orient the bezel, it has an outline shaped to exactly fit the magnetized end of the needle.
- Orienting lines – Parallel lines that rotate with the bezel; aligning these with the north-south lines on a map aligns your orienting arrow with north.
- Magnetic needle – north end is red
A Word of Caution
Since a compass is essentially a magnet on a stick it’s readings are also affected by the presence of ferrous (iron and steel) objects. Be sure to look out for—and stay away from— pocket knives, belt buckles, railroad tracks, trucks, electrical lines, and so forth when using a compass in the field.
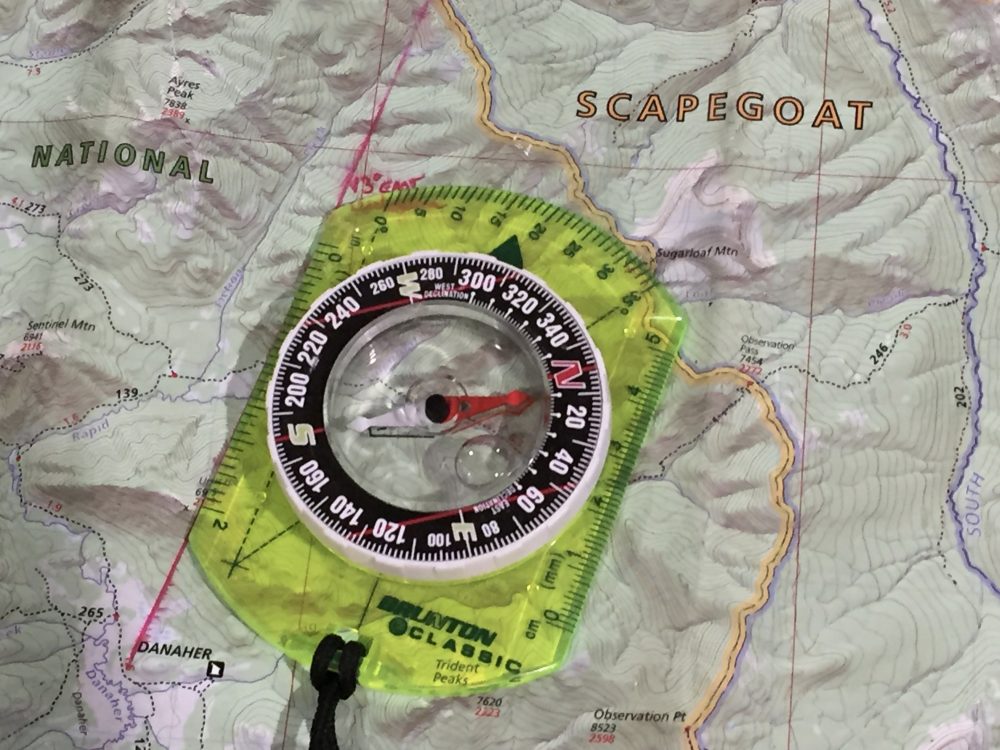
Declination
On a map north is easy to find (it’s usually at the top). However, in the real world, magnetic north (where your compass needle points) and true north (on your map) differ by a few degrees: That difference is known as “declination.”
Why Should You Care?
A single degree of uncorrected error can set you off course by 100 feet over a mile. And in the U.S. declination can vary from 20 degrees east in parts of the west coast to 20 degrees west in parts of east coast. Do the math. 20 degrees times 100 feet and you’re off course by nearly 4 tenths of a mile before you have time to adjust your saddle. That’s the difference between head right or left at the next trail intersection. I think that this illustrates why it’s important to adjust for declination. Failure to do so will make for a very long day in the saddle.
Before you can adjust for it, you have to find the declination value in your riding area. Topo maps list it, but the value varies over time. So check the map’s revision date and consult the National Oceanic and Atmospheric Administration (NOAA) website for magnetic declination.
Adjusting for declination varies with different compass models and you’ll need to read the instructions. Fortunately, after the declination is set for a trip, you don’t have to think about it again until you travel to another area. Another way to handle declination (and the method that I use) is to add magnetic north lines to your map and navigate using magnetic north.
Of course, this is just an introduction into what you can do with a compass. We’ll continue this series at a later date with more advanced navigation techniques. You can also attend a TrailMeister navigation clinic! Check out the schedule here – https://www.trailmeister.com/speaking/
Please keep in mind that while GPS units are handy, electronic gadgets do fail and batteries run down, and when they do, you’ll be glad to have your trusty old school map and compass to guide you back to camp.