Cleaning your saddle pad
Saddle pads get dirty, really dirty, really quickly. Sweat and dirt happen when we ride and it’s up to us to stay on top of the filth lest our mounts suffer. It’s time for cleaning your saddle pad.
I’m not about to say that I wash my pads after every ride. What I do is let them dry between rides (I have three pads that I alternate using) and prior to the following use I gently brush them in a circlular motion, with a rubber curry to break up any dried grime and sweat chunks.
But, by the end of summer those pads have seen a lot of trail miles pass under them and it’s time for a more thorough cleaning to remove the more stubborn deposits.
My fabulous first idea for cleaning your saddle pad was to put the pads in the washing machine. My much better half said that wasn’t going to happen and that I should find a better alternative. Being too lazy to visit the local laundry mat I opted for a fence gate and a hose.
I use Skito saddle pads that have laminated foam shims inside a fleece pocket, so my cleaning process may be slightly more involved.
1 – Remove the foam inserts and let them soak in a bucket of cool water. I don’t use any detergent because it’s next to impossible to get out. Any soap residue that remains will irritate my animals and that’s a bad thing. Scientists consider water to be the universal solvent because it’s capable of dissolving more substances than anything else (barring oils which I don’t generally find inside my saddle pad). I use this property to my benefit and simply repeatedly squeezing the foams to slowly work any accumulated salts out of material. Dump and refill the bucket with fresh water as often as you can. I’ve been known to put a small amount of vinegar in the water to help kill any lingering beasties.
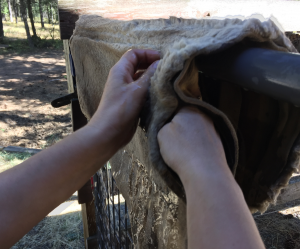
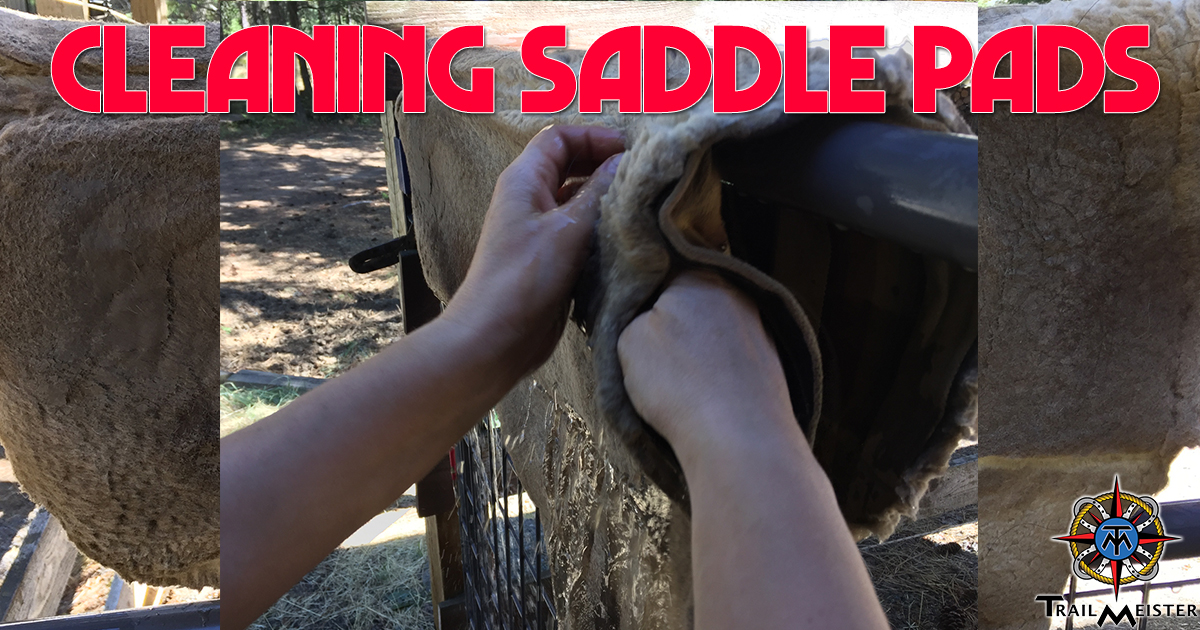
cleaning your saddle pad
2 – With the saddle pad securely supported, it’s going to be heavy, use a garden use to spray the saddle pad from the inside out. I want to force the grime out of the material not push it further into the fibers. I also try to work from the middle outward, again always trying to push the dirt away from the pad. I’ve found that once the pad is completely saturated with water that rubbing the material with my fingers is easier on the fabric and works better than brushing with curry combs. This phase takes a while and yes, you will be cold and wet, but keep up the good work until the water runs clear.
3 – Once the pads and the foams cease releasing dirt into your clean water it’s time to dry. Help the pads keep their shape by hanging them over a saddle rack, out of the sun and away from direct heat. Leaving the pad hanging over the gate will cause it to stretch and lose its contoured shape. Direct heat or sun can cause the materials to shrink. Yes, drying this way is slow and takes a while. That’s why we have spare saddle pads.
I wish that I could say that these three steps to cleaning your saddle pad are a great secret that I discovered. Unfortunately, equipment cleaning is just another part of riding horses and mules. What I have discovered is that by ensuring that when this vital piece of equine tack stays in good working condition it makes for a better ride by continuing to provide the support, protection, and comfort that my animals deserve.
How often do you clean your saddle pads?
For more TrailMeister trail riding tips and thoughts visit www.TrailMeister.com